How to Add Google Analytics to an Overlay Tour using the Code Plugin

Adding Google Analytics to your virtual tour enables you to track the number of visitors to your tour, the search keywords they use to find your site, the time spent on your site, goal conversion, and much more.
Assuming that you already have a Standard Google Analytics account and you have already set up a property for your tour in Google Analytics, which allows you to generate your page tag.
With that settled, you’ll explore the steps to add Google Analytics code to your tour overlay.
Step 1: Find your page tag
- Log in to your Google Analytics account
- From the left column titled Account, select an account and a property from the dropdown menu.
3. On the bottom left-hand side of the page, click Admin
4. On the Admin screen, click Data Stream and select the page.
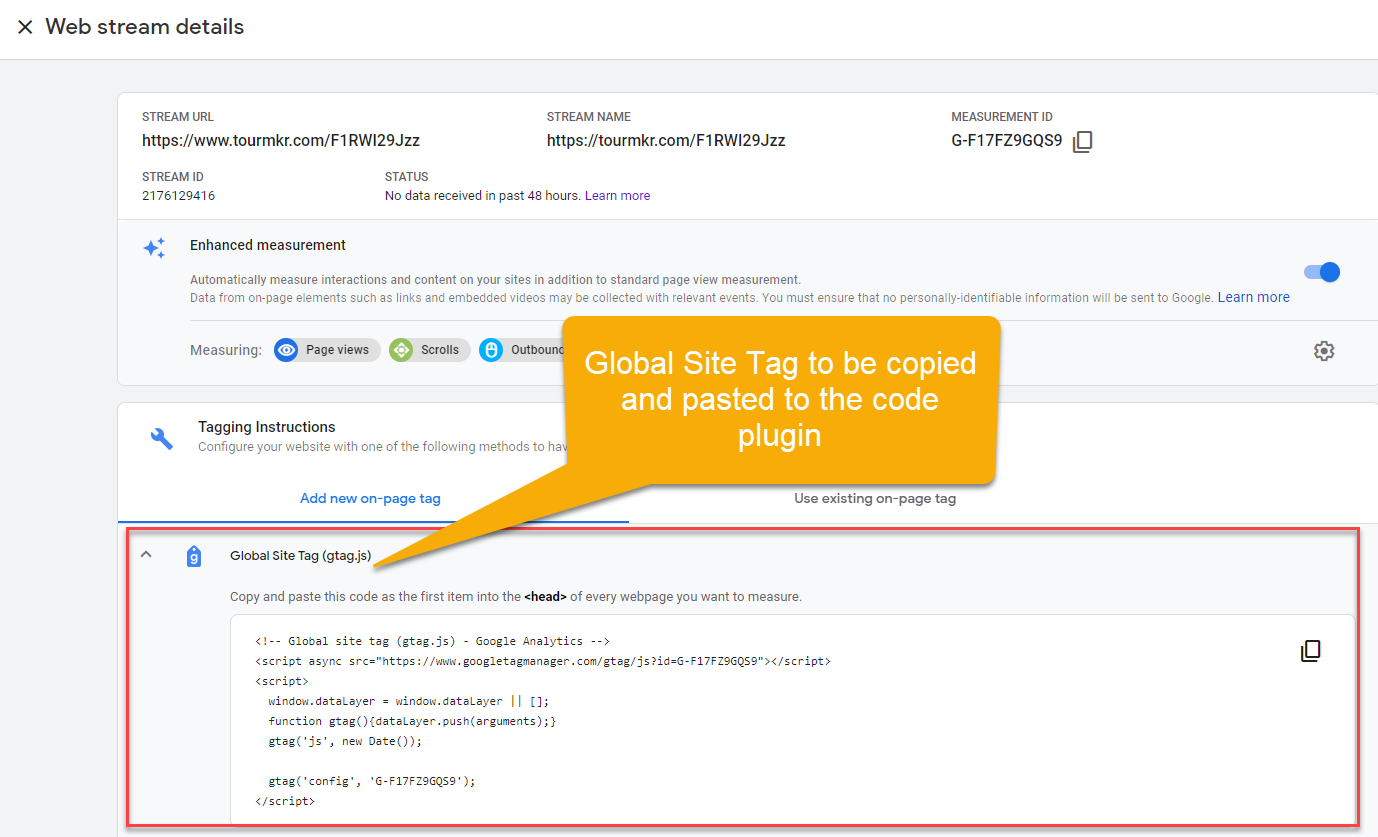
5. Your global site tag appears under Tagging Instructions.
6. Under Tagging Instructions, copy the entire section of code that appears, beginning with:
<!-- Global Site Tag (gtag.js) - Google Analytics -->
and ending with
</script>
Step 2: Add your tag to overlay code plugin
1. Click on the “+” icon (A key) to open the Plugin Manager for Hotspots, Menus, Maps, Control Center, and Other. Then click the Code plugin under the Other.
2. The code field appears on the right side where you can enter the tracking code or Global Site Tag (gtag.js). Paste the entire Google Analytics page tag in the field.
3. Click “save” and “publish” to apply the changes. After you add a data stream, it can take up to 24 hours for data to appear in your reports.
4. Now, confirm the data is being collected in Analytics once you've implemented the tracking code to your tour. To confirm that your property is receiving data, check the Home page or the Realtime report. If you've set up the code correctly, you will see the report like the following example.
