How To Use The Auto Blur For Finding Faces And Plates In Your Panoramas
Some panoramas to be uploaded on Google Street View might require blurring to protect the image rights of any individual appearing in the panoramas, for instance, car numbers, human figures, or any sensible information. However, manually blurring faces is time consuming.
GoThru helps you do the blurring in a faster way using the Auto Blur function that detects faces and plates automatically in your 360 panoramas. You can follow the steps below.
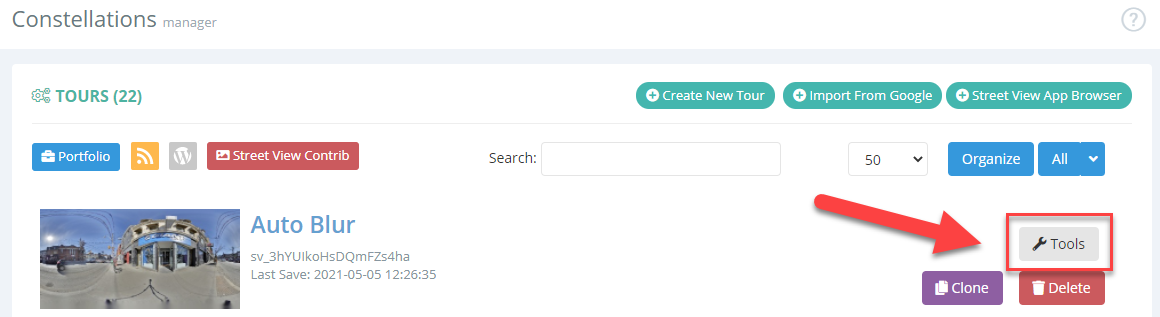
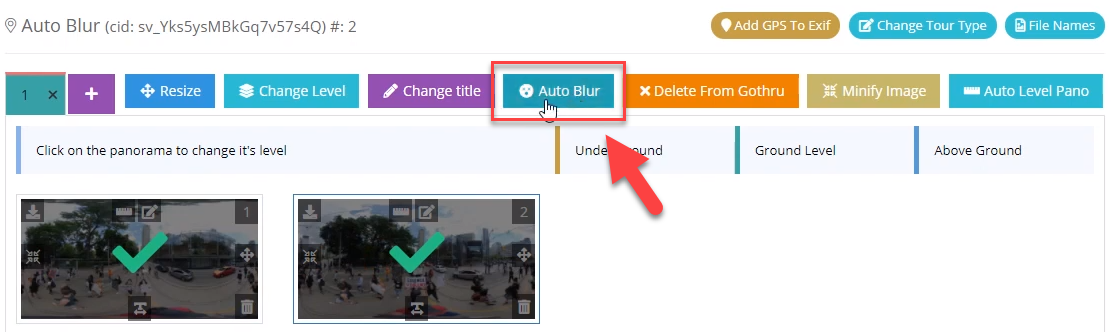
1. Go to GoThru -> Constellations, then find your tour on the list. Press the Tools button.
2. In the Tools page, click the Edit button.

3. In the Edit Constellations page, select the panoramas you want to blur.
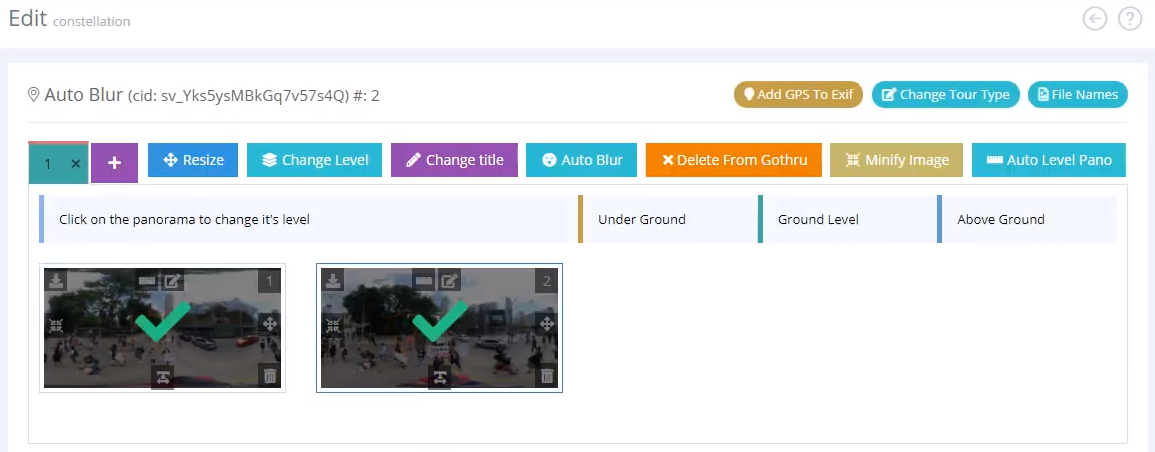
4. Then press the Auto Blur button.
5. Prompt window will appear asking you to verify the blurring process. Click OK.

6. The blurring process takes about 15 seconds for each panorama.

7. When the blurring process finished, go back to Tools the press Create Navigation button to see the results of the auto blur function.

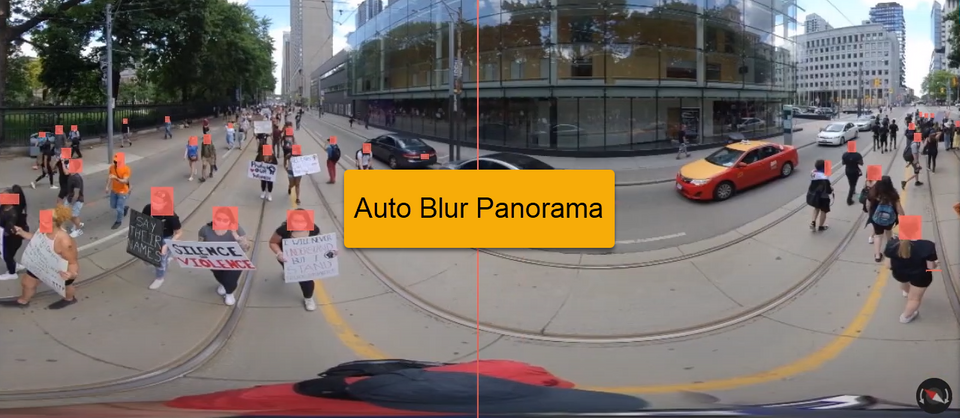
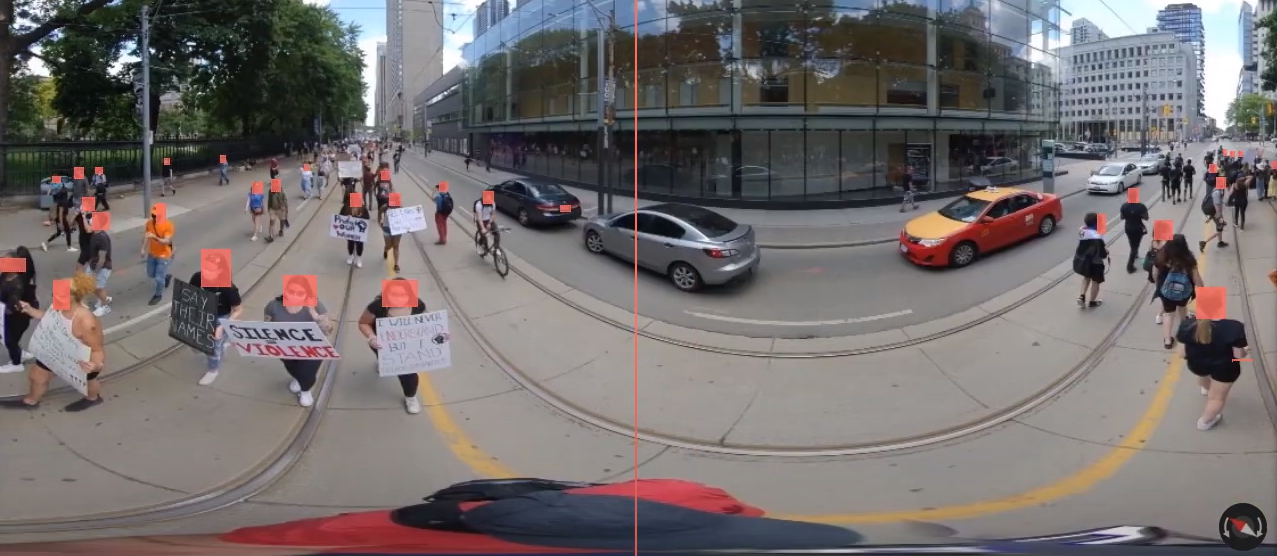
8. In Moderator, you can notice human faces and license plates are already blurred by the system. Carefully navigate through the panorama to check if the objects are correctly blurred.
9. In case the system blurred for example an unnecessary object, you can easily remove the blur in GoThru moderator. Click on the blurred object then press the X to remove the blur.
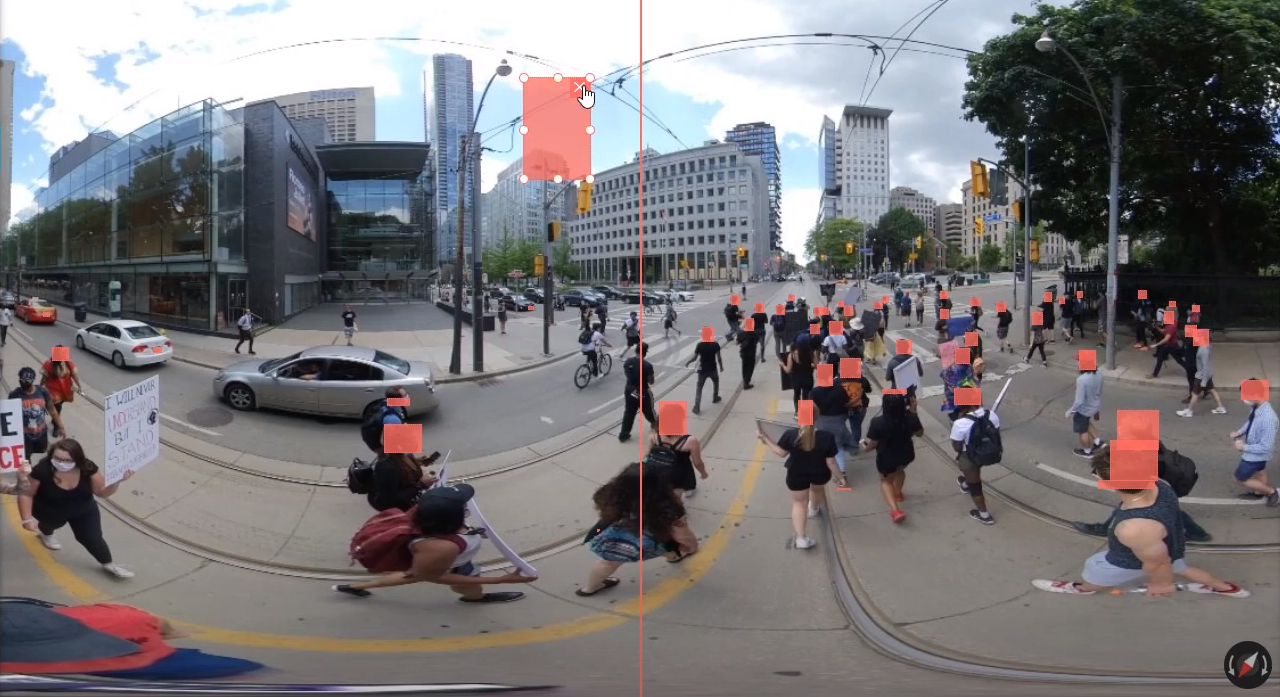
10. In case the auto blur misses out faces or plates, you can add blurs manually, activate the Blurring Mode by pressing B from the keyboard. Press Shift and, on the image, select with the left mouse click the area you want to blur.
Read the documentation How to Blur Using GoThru Manually.
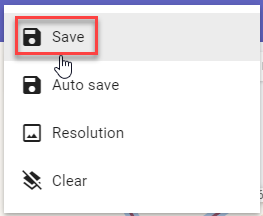
11. When you are done checking the blurring, save the changes by pressing Ctrl + S or by choosing Save from the upper left corner menu of the Moderator.
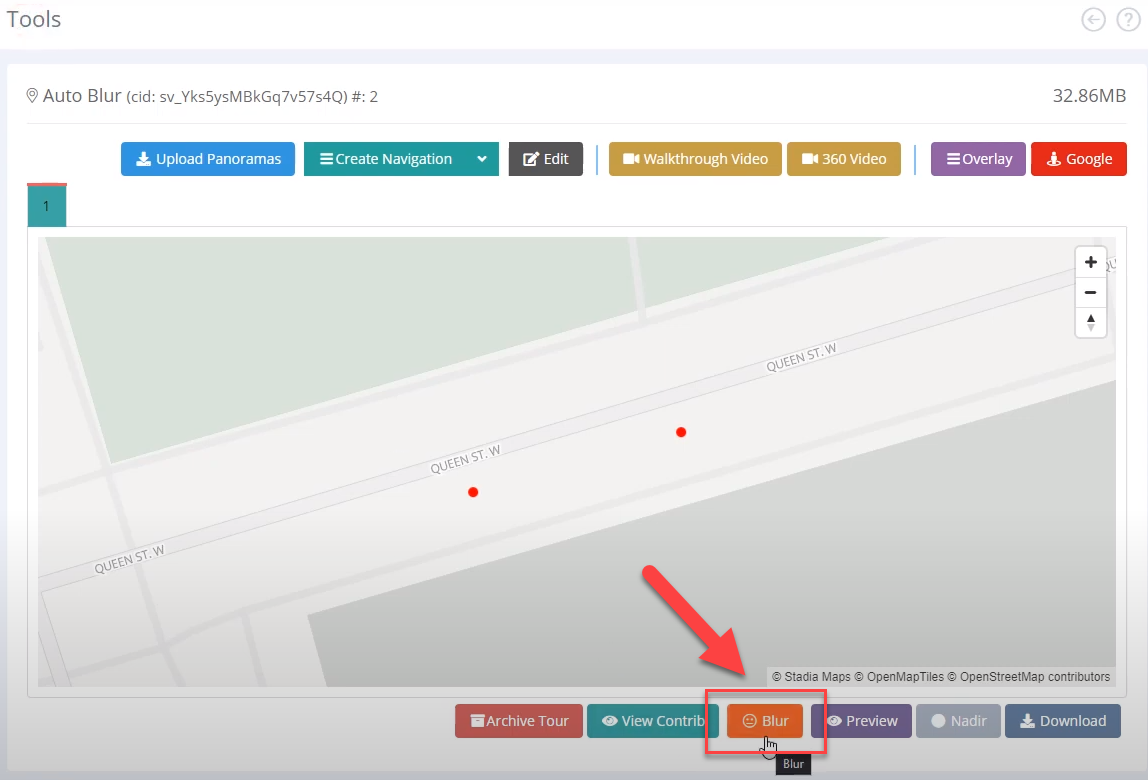
12. Finally, back to Tools, press Blur to apply the changes.