How To Work With Compass Plugin

Compass plugin allows you to put a compass for tour navigation that indicates direction. It can be set up from Other > Compass, in the plugin manager.
Following are the steps to add a compass to your tour:
1. Click on the “+” icon (A key) to open the Plugin Manager then click on Compass.
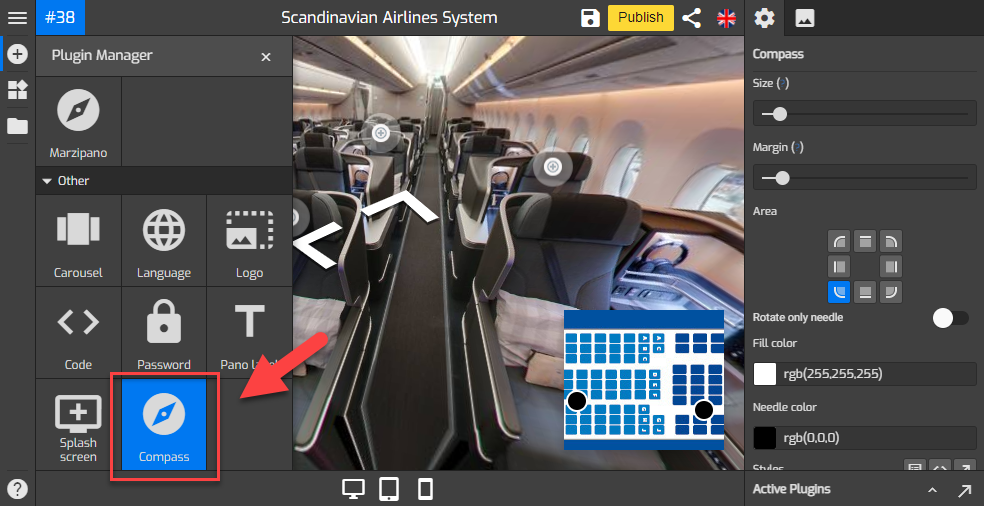
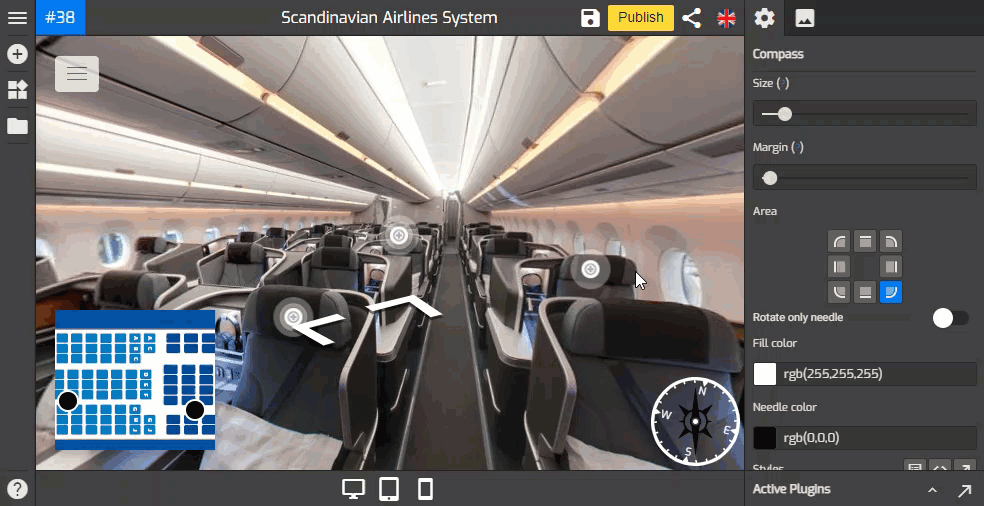
2. The compass settings appear on the right panel and the default compass on the bottom-right corner.
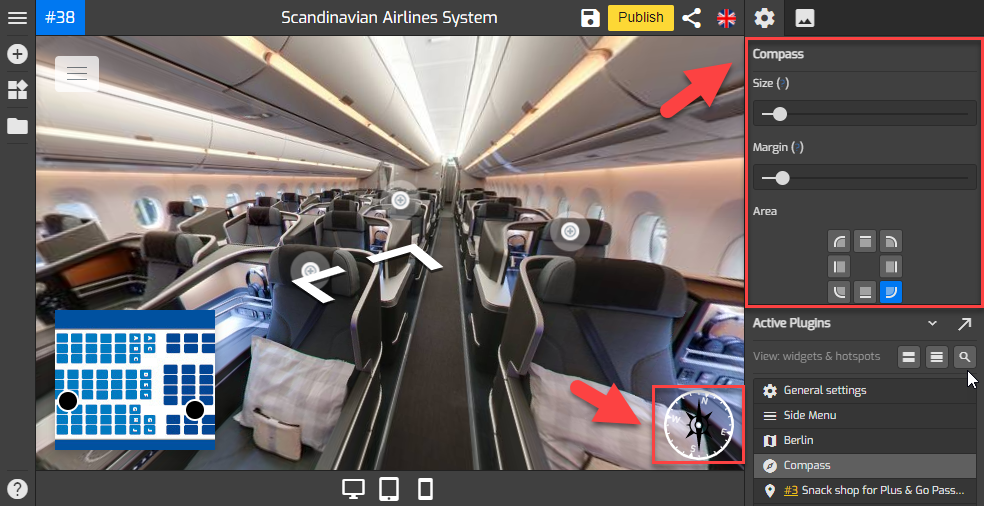
3. Set up the compass using the tools under the compass settings.
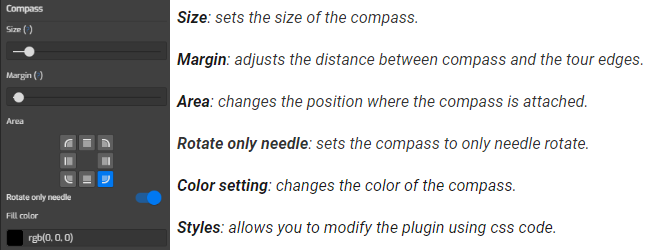
4. Firstly, adjust the compass size and margin then select one area that fits your compass.
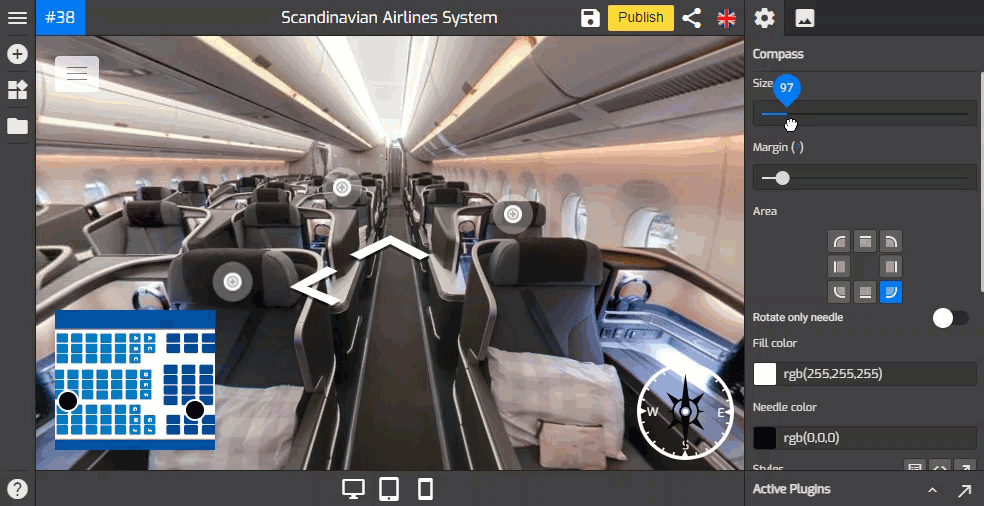
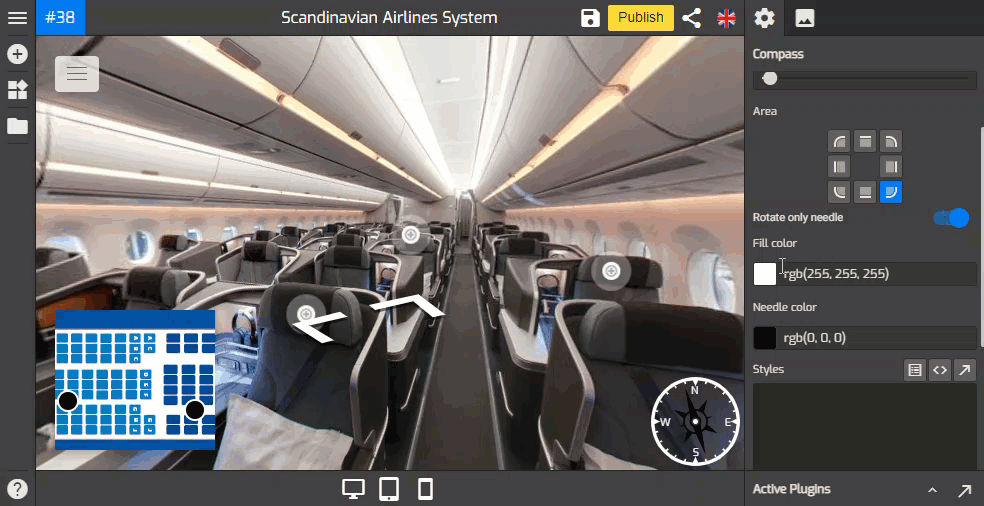
5. You can set the compass to only needle rotate or all rotate by switching on the rotate only needle toggle.
6. Adjust the compass colors using its color settings including the needle and fill colors.
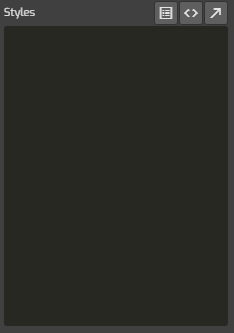
7. Styles at the lower part of the settings allows you to modify compass plugin using css code. You can copy and paste your codes here then apply some changes to the plugin.
8. Finally to apply all the compass to the tour, just click “Save” and “Publish” at the top-right corner.