How to work with levels in GoThru Street View Editor
When uploading panoramas to GoThru, the upload will be automatically made on one level. But in certain cases you might need to have your panoramas on different levels, so GoThru comes with the “levels” feature to facilitate your work.
Operation 1: Creating levels
To create levels in GoThru please follow the steps below:
1. Create a tour and upload your panoramas.
2. Go to Constellations and decide how you want to structure your panoramas onto levels and how many levels do you need.
3. Press the Edit button. GoThru will take you to the Edit Constellation section.

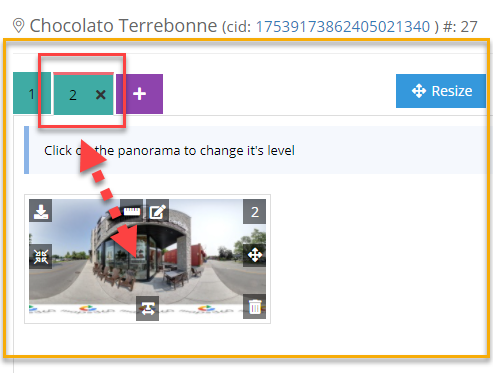
4. Now press the Add Level button.

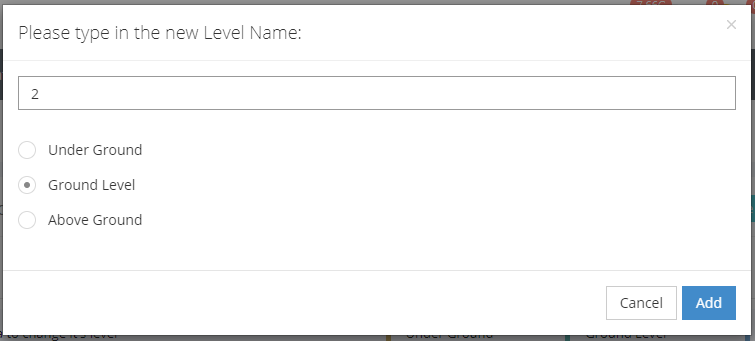
5. Type the new level name then check the corresponding Google level (Underground/Ground/Above Ground). Google will sort the levels in the elevator widget based on these types; Underground is for levels that are underground, Ground for the ones on the ground and Above ground is for levels that are above ground. Press Add.
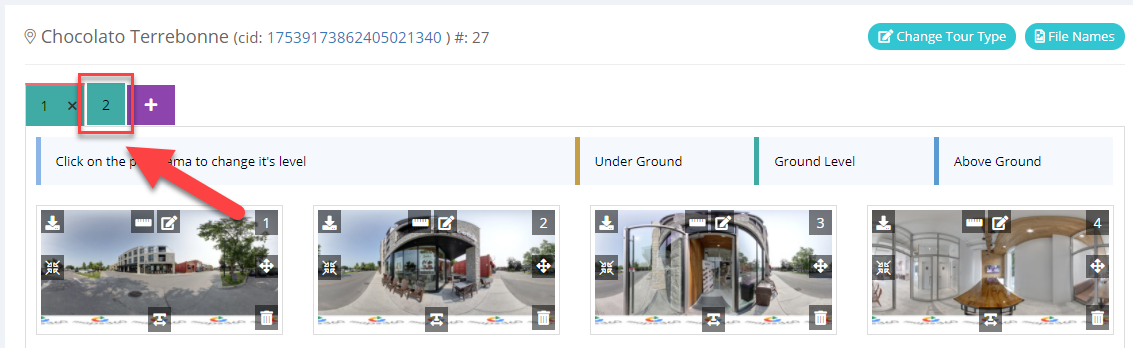
6. Refresh your page (CTRL+R) to visualize your levels. Repeat the step above to create as many levels as you need.
7. Now proceed to assign the panoramas to their levels. Click on the desired panorama, select the level from the dropdown box, then press the Move button.
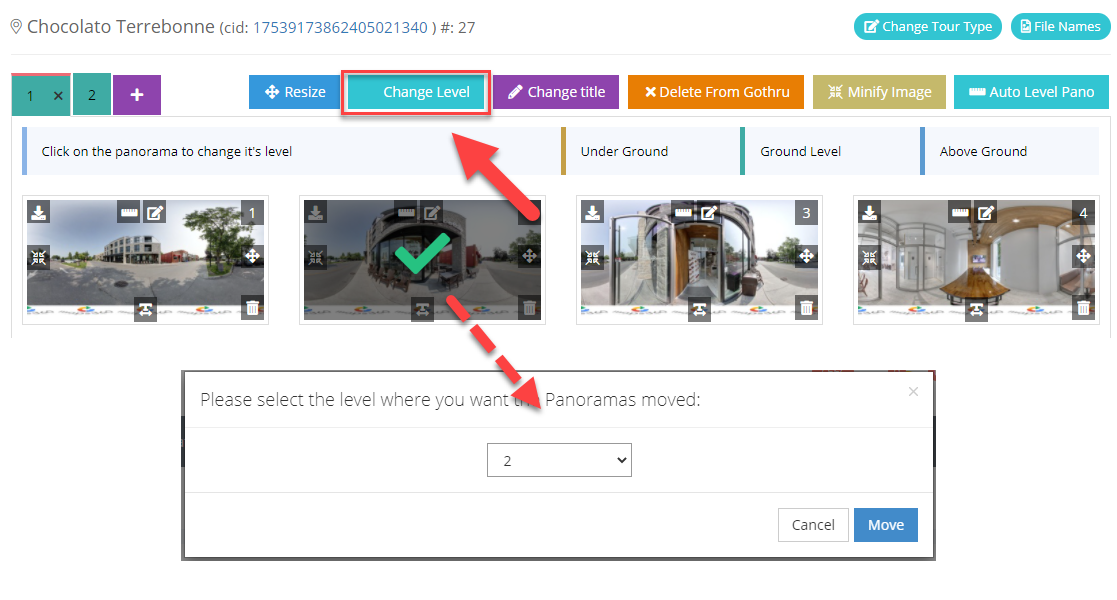
8. Repeat the step above until you assign a level to all the panoramas. Refresh your page (CTRL+R) to visualize your levels and their panoramas.
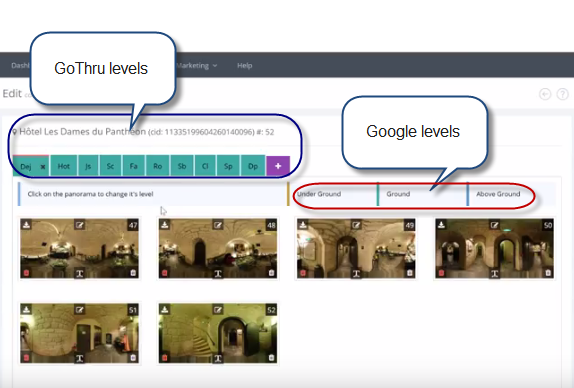
9. Besides GoThru levels that has been created above, you can see Google-specific levels: Underground (yellow), Ground (green), Above Ground (blue). Google will sort the levels in the elevator widget based on these types:
- Underground is for levels in yellow that are underground
- Ground in green is for the ones on the ground
- Above ground is for levels in blue that are above the ground
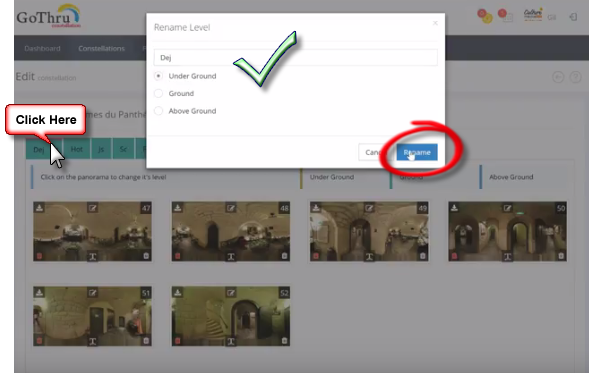
10. GoThru also allows you to rename the floor and change the corresponding Google level types. Click on the GoThru level name that you have created and, in the Rename Levels box, give a new name to the level (maximum 3 characters), then check the corresponding Google level (Underground/Ground/Above Ground). Press Rename.
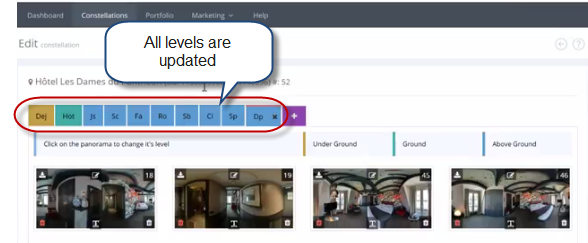
11. You will notice the level has updated and changed color, indicating that now it belongs to the Underground type.

12. Repeat the operation described above for all GoThru levels. When you are done, refresh the page (CTRL+R) to make sure the server got all the levels properly.
Operation 2: Make a connection between levels
1. Press the Back button to go to the Constellations section. Press the Create Navigation button.

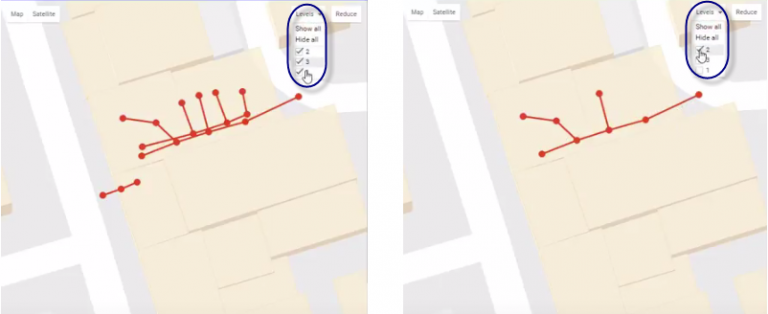
2. The Moderator will open. Here, by default, you will see displayed on the map all existing levels. If you want, you can select to work only with some of the levels and hide the rest. You can do this by checking/unchecking the levels from the dropdown list. Also, Hide all levels and Show all levels options are available.
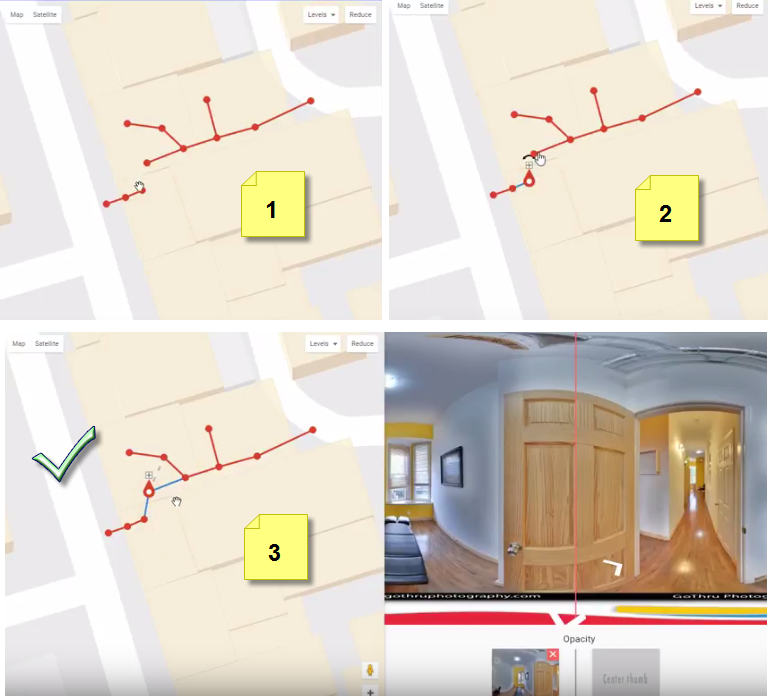
3. At this point, it is possible to make a connection between existing levels. Press the dots where you want to create the connection for the two levels as shown below:
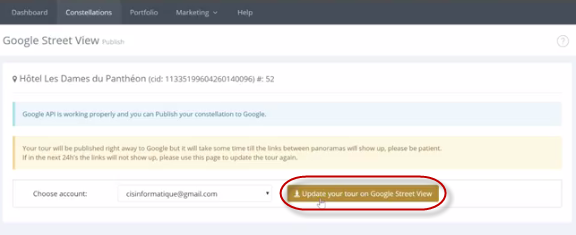
4 To save the changes, you will have to go to Constellations -> Google -> Update your Tour on Google Street View. Your tour will be then on levels on Google right away.

5. Press Update your tour on Google Street View -> Start Publishing.
Note: Your levels will show up in Google Street View in about 1-2 hours and the links will function in about 24 hours.
