How to Work with Floor Map Plugin

Floor Map allows you to make multiple level maps in one overlay. It is very suitable to show building directories such as houses or buildings with multi-stories. It is supported by a level switcher so the users can go floor to floor and reach specified rooms directly.
In this tutorial, you will learn how to work with floor map plugin on GoThru Overlay Editor.
Step 1: Set Up the Floor map
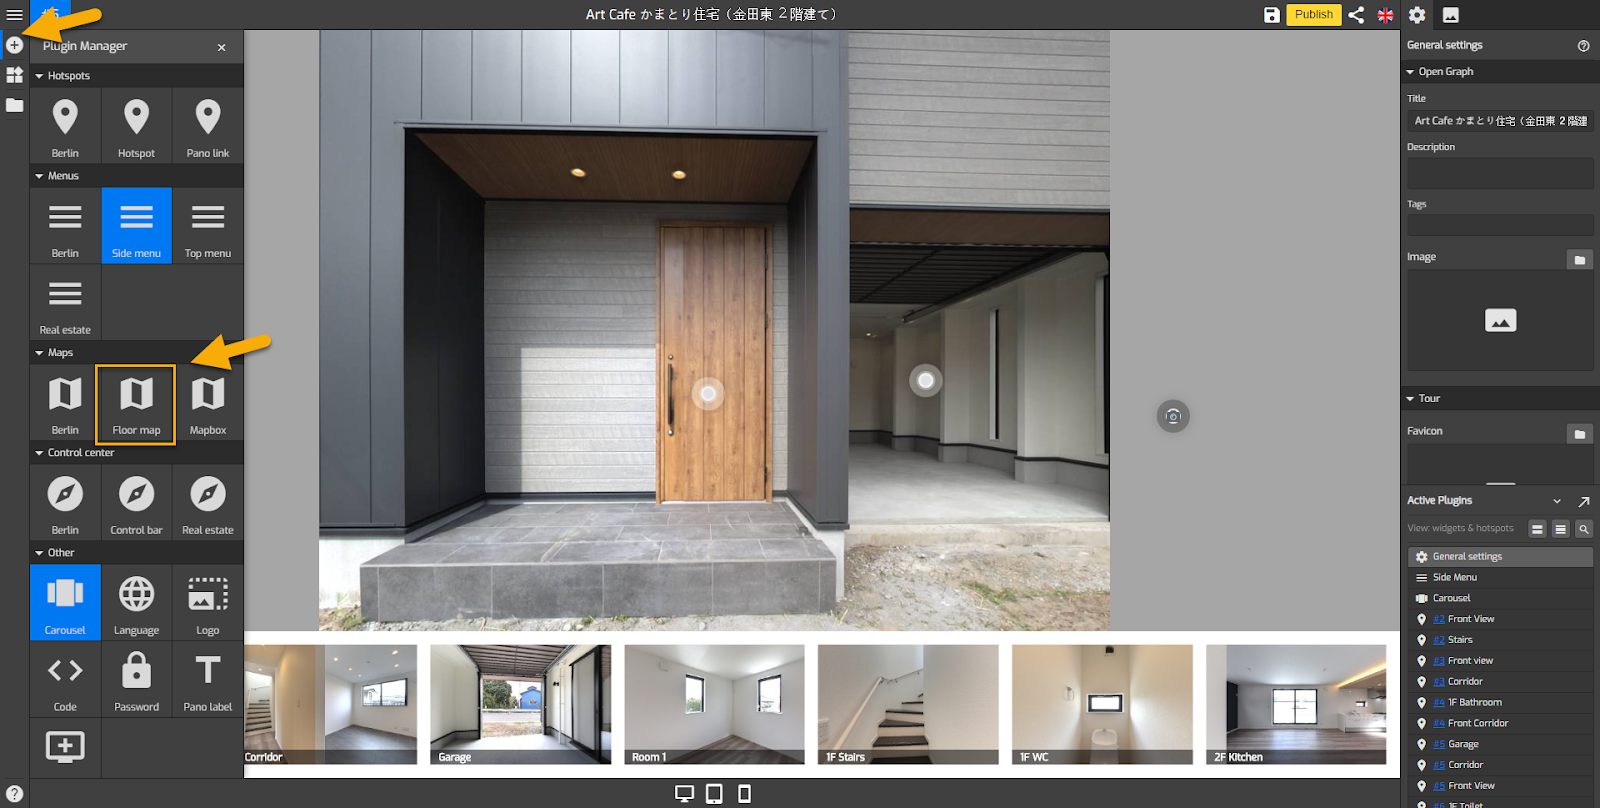
1. Click on the “+” button (or A key) to open the Plugin Manager then select Floor Map.
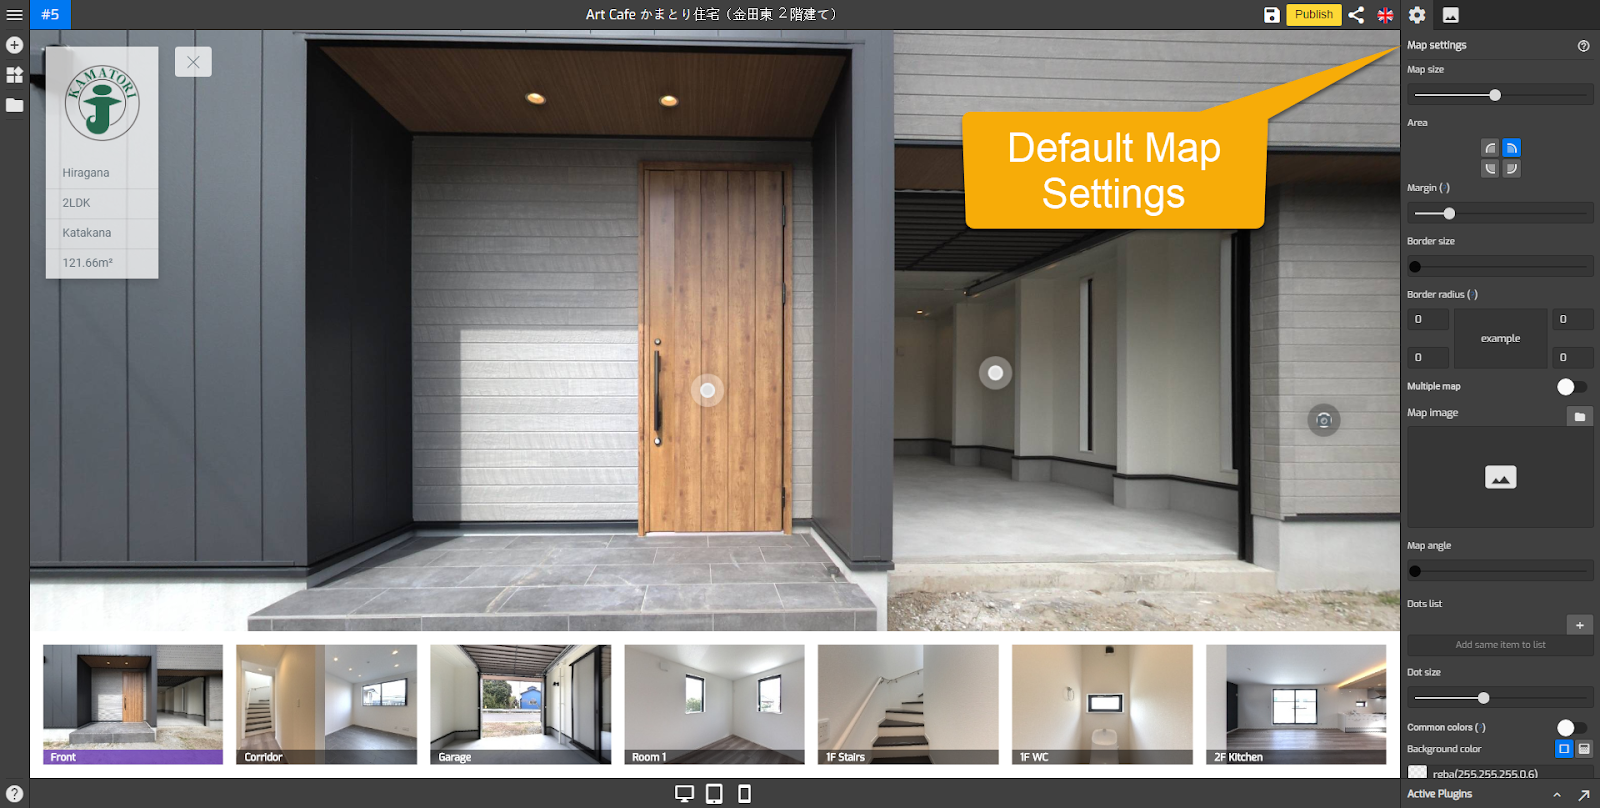
2. The Map Settings appear on the right panel and the default floor map is at the top-right corner of the screen. The floor map will appear after you add the map image.
3. To add the map image, click on the map image box to open the asset library where you can upload a new image or select an image that is already there.
4. For the multiple map option, you can switch on the multiple map toggle to add a new floor to the map then follow the previous steps to add the map image.
5. Resize the map by using the map size slider and choose the position of the map - the top right corner, bottom right corner, top left corner, or bottom left corner. Defaults to top-right corner.
6. Round the map border by increasing the value of the border radius field. GoThru Overlay Border Radius will automatically adjust all 4 corners at once if you click on the up arrow in the border radius fields.
Step 2: Connect the map to Panoramas
1. To connect the map to panoramas in the tour, you can navigate to the dots list under the map settings.

2. On the dots list, you see the plus `+` button that will be used to add the active panoramas to the map.

3. Before you connect a panorama to the map, you have to select the panorama first and put that panorama in an active position. You see in the example below panorama number #5 is the active pano.
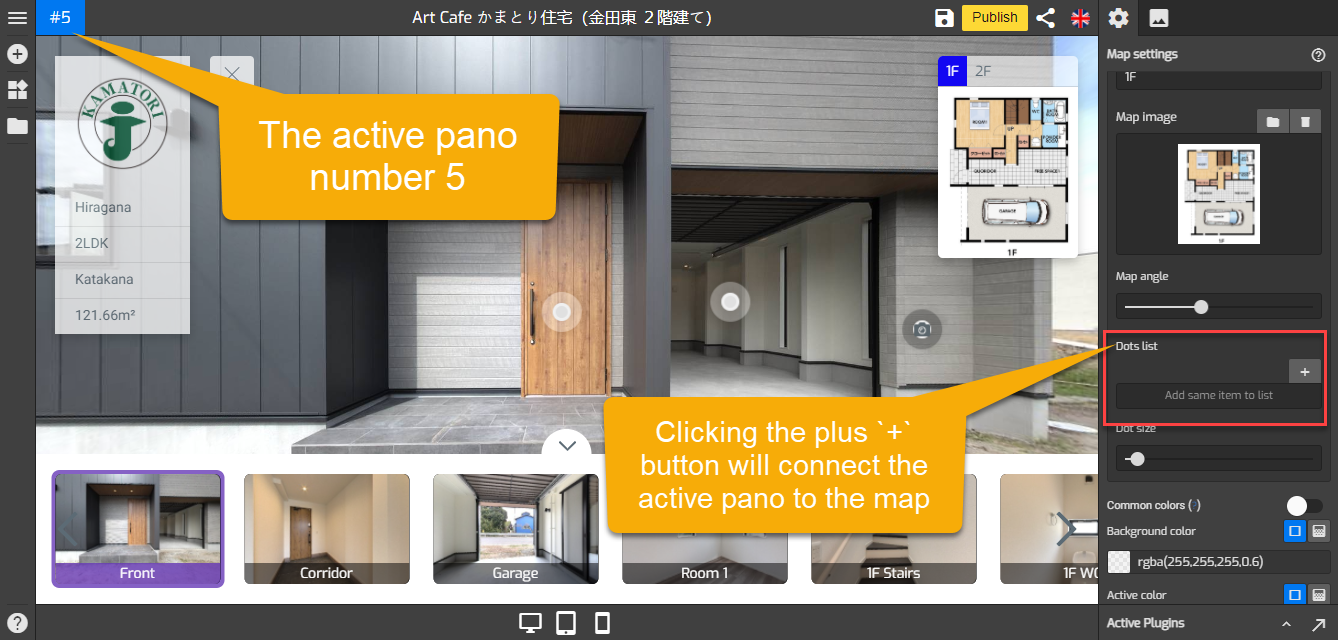
4. Now, click the plus `+` button to add the active pano to the map.

5. Overlay will add the dot or marker of the active panorama to the map but the position of the dot does not automatically follow the map image so you have to adjust it manually.
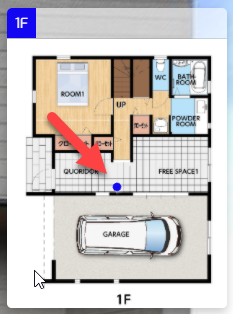
6. To adjust the dot position, you can drag it around the map then place it to its right position like in the following example.
7. You can repeat the steps above to connect more panoramas to the first-floor and second-floor map.
Step 3: Adjust the Map Color
On the color section, you can change the background colors, active colors, text colors, dot color, and set the colors as common.
- Common colors - sets the map colors to connect to colors which in the general setting
- Background color - set the color of the map background
- Dot color - set the color of dots in the map
- Active color - colors of the active dots
- Text color - set the colors of the text in the map
- Set color as common - allows you to apply and save the color which belongs to the Berlin map plugin and will become the default color choices for other plugins including the general setting.

Step 4: Save and Publish
Before you publish the tour, you can try to click on the map markers or dots to make sure that the panoramas already connected. If it works the marker will bring you to the linked panorama on the tour. Once you are happy with the map setups, click “save” and “publish” to see the results.
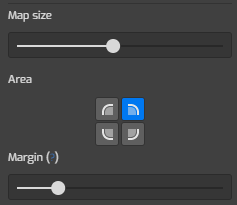
Available map setting tools
Map Size
This feature is used to adjust the size of the map in your overlay, slide the bar to the right to enlarge the map.
Area
You can choose the top right corner, bottom right corner, top left corner, and bottom left corner of your screen. Defaults to 'top-right'.
Margin
Margin is the distance between the map and the tour edges. Adjust the margin to make your overlay look more attractive and match the design to your Side Menu
Border
The border is space between your Map and the background
Border Radius
The border radius is the roundness of the corner in your map background. Increase the value in each field to make a rounded corner and GoThru Overlay Border Radius will automatically adjust all four corners at once.
Multiple maps
Turn on multiple map buttons to make a multi-level map, give the name of each level. The name also represents the level switcher that allows you to move from one floor to the other floors in the building.
Map Image
you can use your own designed map that you have uploaded to the asset manager.
Map Angle
This feature adjusts the angle of a dot on your map. Make sure the dot faces the correct direction to your pano.
Dot
Use the Dots list to add clickable dots on the map connected to the rooms in a tour and Dot size to adjust the size. You can also change the color of dots on the map using the Dot color tool.
Colors
Common color sets the map colors to connect the colors in the general setting.
Background color sets the color of the map background.
Text color sets the colors of texts on the map.
Active color sets the color of the active dots.
Dot Color sets the color of dots on the map.
Set color as common allows you to apply and save the color which belongs to the Berlin map plugin and will become the default color choices for other plugins including the general setting.